1/4 in. Porous Soaker Hose
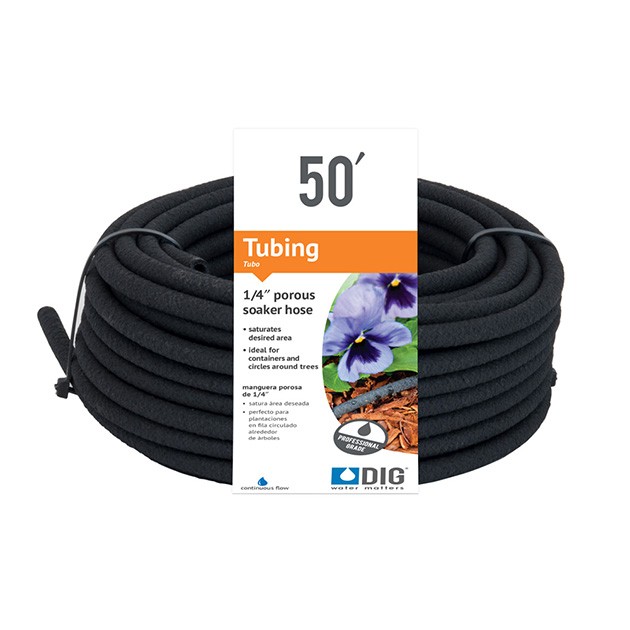
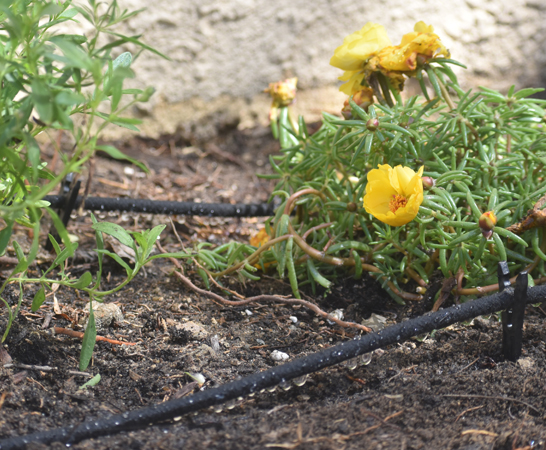
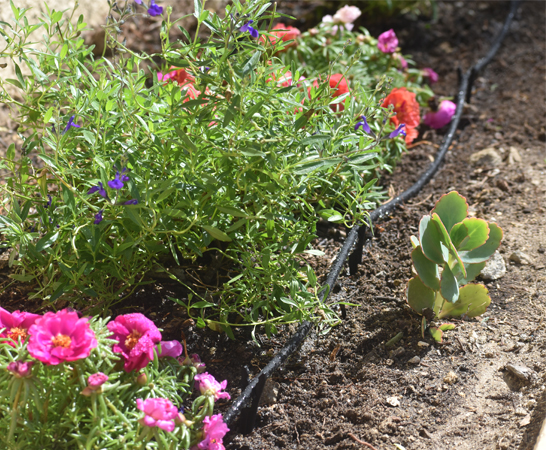
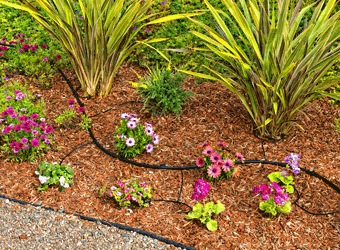
DIG’s PSH50 Porous Soaker Hose is an extruded small-diameter flexible pipe made of UV-resistant recycled rubber from old tires. When looked at under a magnifying glass, the soaker hose is peppered with many tiny holes, and when under pressure, it sweats or weeps along its full length. The porous soaker hose can be used in short lengths to water planter boxes, narrow plantings and vegetable gardens, and can be looped or circled around trees. It can be connected into the drip tubing or micro tubing using 1/4″ barbed fittings.
Features
- Use for planter boxes, closely planted or narrow areas, vegetable gardens or loops around trees.
- Allows water to gently trickle directly to the root zone, delivering a constant deep watering through its porous openings.
- No special tools or glue are needed.
- Saves money by significantly lowering the cost of system components compared to conventional irrigation systems.
- DIG’s drip irrigation products may be exempt from residential and commercial watering restrictions (check local codes).
How to Order
| MODEL | DESCRIPTION |
|---|---|
| PSH50 | 50 ft. Porous Soaker Hose |
Specifications
- Operating pressure range: 10 to 25 PSI
- Recommended operating pressure: 15 or 25 PSI (use with model D46, 25 PSI pressure regulator)
- Flow rate per 50': 46.5 GPH @ 15 PSI and 65.3 GPH @ 25 PSI
- Porous soaker hose length: 50' x 1/4" with .160 ID x .320 OD
- Maximum recommended distance for a length of 1/4" soaker hose line: 15'
- Total flow rate for this coil: 65.3 GPH (1.09 GPM) @ 25 PSI
Reommended length at operating preassure of 25 PSI
| length in feet | pressure loss per 50' in PSI |
|---|---|
| 10' | 2.8 PSI |
| 15' | 10.5 PSI |
| 20' | 20 PSI* |
About
Soaker hose, like drip irrigation, delivers a constant deep watering directly over plant roots. Water flows through the porous openings of the hose, guaranteeing efficient watering over the length of the line used. The 1/4″ soaker hose is easy to handle and well suited to water planter boxes, garden beds and plants in close spacing such as rows of shrubs.
The recycled rubber porous soaker hose can be installed above the ground and covered with mulch to blend with the landscape. For the best result, this 50′ soaker hose can be cut to short lengths of up to 15′ and connected into 1/2″ drip tubing or 1/4″ micro tubing using the 1/4″ barbed fittings. The soaker hose can be used as part of a drip irrigation installation or a system with soaker hose only, and operates under a range of pressures that can’t exceed 25 PSI. The 25 PSI or lower pressure regulator is used to lower the incoming pressure of the system to the suggested operating pressure, which is within the range of recommended pressures for a soaker hose, drip irrigation or micro sprinkler system.
Installation suggestions:
Basic installation recommendations for this product include first reviewing the area and then making a drawing of the garden or site with your preferred layout.
If automation is required, use one of DIG’s hose end timers or battery operated controllers. The ideal controller should have flexible scheduling and two to four start times per day for added flexibility.
- In the installation stage, to the faucet, first connect a backflow device (model D45), then a 25 PSI pressure regulator (model D46). If using 1/2″ drip tubing as the supply line then add a 3/4″ swivel adapter with screen (model C34). If water quality is a concern, we highly recommend using DIG’s fine mesh 3/4″ filter with 155-mesh (model D57A) If the system is used from a rain barrel, the pressure regulator is not needed.
- Lay out 1/2″ drip tubing per your drawing and secure the drip tubing to the ground using stakes (model R60).
- Throughout the installation add fittings if needed such as tees (model C35) and elbows (model C36) leaving the end of the drip tubing open.
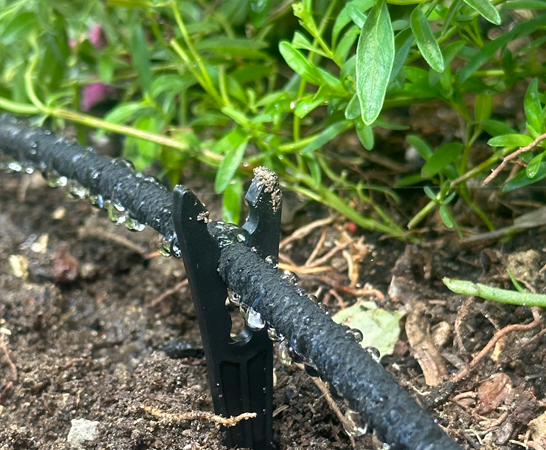
A. Use the 1/2″ drip tubing as the main lateral and connect the 1/4″ porous soaker hose to the 1/2″ drip tubing, or connect 1/4″ micro tubing to the 1/2″ drip tubing, and connect the porous soaker hose to the end of the 1/4″ micro tubing. - Connect the soaker hose into the 1/2″ drip tubing by punching a hole into the 1/2″ drip tubing using a punch (model D44) and inserting a 1/4″ barb (model H80A or H80B) or barbed tee (model H82A or H82B). Connect the porous soaker hose into the chosen barb fitting.
- If using 1/4″ micro tubing, insert a 1/4″ barb into the micro tubing and connect the soaker hose into the micro tubing. Keep the soaker hose at a length of up to 15′.
- Lay the soaker hose along the row or loop the soaker hose around trees, roses or shrubs and secure it to the ground using a gallivanted wire (model P32B) or plastic wire (model P31B).
- Turn the water on and flush the line and then turn the water off.
- Close the end of the 1/2″ drip tubing using the hose end (model Q58) or figure “8” (model F68B) and then close the end of the 1/4″ soaker hose using the large size 1/4″ goof plug (model G79B). Keep the length of the soaker hose to a short run for even uniformity. It is recommended not to exceed a length of 15′.
- Pressure-test the system to identify leaks in the drip hose laterals, fittings and soaker hose and then program the timer or controller.
Disadvantages of soaker hose
- Soaker hose sweats or weeps small amounts of water along its full length or along the line, so plants and weeds both are watered.
- The soaker hose can be susceptible to damage from rodents and household pets.
- A filter is required to guard against potential clogging of the small pores.
- Over time, soaker hose may stiffen with age, becoming brittle and less flexible.
- You cannot see a soaker hose system working, as opposed to a conventional sprinkler system.
About the soil and suggested watering intervals:
- Sandy soil or light textured soil: Water percolates straight through before it can spread far enough horizontally, so apply water at close intervals such as every other day for 20 to 90 minutes depending on plant size and type, daylight conditions (full sun, partial sun or shaded) and weather pattern (cold to hot) with the plants under full sun in hot conditions getting the longer period.
- Loamy soil or medium textured soil: This is the ideal soil condition with water moving slowly and spreading evenly, so apply water at wider intervals such as every two to four days for 15 to 90 minutes depending on plant size, type, daylight conditions (full sun, partial sun or shaded) and weather pattern (cold to hot) with the plants under full sun in hot conditions getting the longer period.
- Clay soil or heavy textured soil: Water is absorbed very slowly, so apply water at longer intervals such as every three to five days for 30 to 60 minutes depending on flow rate, plant size and type, daylight conditions (full sun, partial sun or shaded) and weather pattern (cold to hot) with the plants under full sun in hot condition getting the longer period.