Let’s Get Growing
by Stuart Spaulding —
CLIA Certified Landscape Irrigation Auditor Training & Communications Manager at DIG Corp.
Skiers and snowboarders may not be too “stoked”, but now that the spring equinox is over, gardeners in the northern hemisphere have something to look forward to- Spring has finally arrived! Now the days start getting longer and the nights shorter, and it’s time to start planning, and soon planting, our new gardens and prepare for the warmer days to come.
This is the perfect time to plan and design the layout for your garden on paper and begin deciding what plants you want to add to your yard and patio in the spring. It is also a great time to plan and design a drip irrigation system that will efficiently irrigate your plants without wasting water. Even if the winter season provided plenty of rainfall in your region, experts agree that the watering restrictions and reduced water deliveries will remain in place for the foreseeable future. So, it is important to continue to conserve water by any means possible. Utilizing drip irrigation should be at the top of your list.
What is Drip Irrigation?
Drip irrigation (sometimes referred to as micro irrigation, low flow irrigation, or trickle irrigation) is the slow and controlled delivery of water directly to the plant root area using point-source, dripline, or other emission devices.
Drip irrigation helps maintain optimum soil moisture level around the plant roots with less water lost to evaporation, runoff, and wind. Achieving the proper balance of water and air around the plant roots contributes to better plant growth, while minimizing weed growth.

The Drip Irrigation System
A drip irrigation system can be designed as a stand-alone system (starting from a faucet), as a retrofit of an existing landscape sprinkler system, or as a new irrigation installation (starting from an in-line or anti-siphon valve). It should be designed to operate efficiently and remain trouble-free through the life of the system. This requires consideration of the static pressure, maximum volume of water available, system pressure, the total flow rate of the emission devices you will need, and the type of connections required.

The Head Assembly
The point of connection to a drip system can be a hose bib, anti-siphon valve, in-line valve, well, or pump. It may even begin from a sprinkler-head riser or from a rain barrel for gravity feed systems. For any application you choose, DIG can provide a convenient and efficient solution.
The key requirement at the point of connection is the “head assembly”, which consists of a filter and a pressure regulator. The head assembly can be attached to a hose bib (hose thread components) or connected to a valve (manual or automatic) (pipe thread components).
In some regions, a backflow preventer or anti-siphon device is required to meet local codes. A backflow device keeps contaminated water from re-entering the water supply and is highly recommended. A vacuum breaker (backflow preventer), when used, is installed on the hose bib (hose thread) before the head assembly. If you are planning to use a hose end timer, mount the backflow after the timer [downstream], to prevent stress on the device.
The filter, used to protect the small water passages of the drip emitters and micro sprinklers, is installed after the backflow device. The pressure regulator (preset or adjustable), used to reduce the incoming pressure to the appropriate range for optimum performance, is installed after the filter.
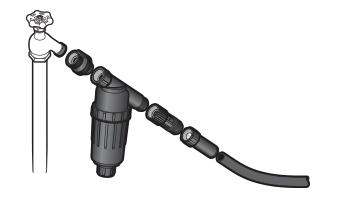
Starting a drip system from a faucet (hose bib)
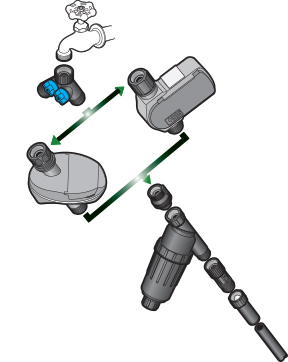
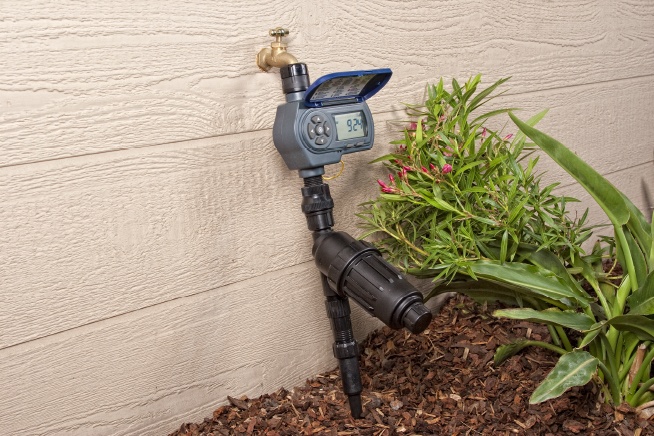
If you have an outdoor faucet, then you have a good place to start your drip system. If the faucet is needed for a garden hose, install a Y splitter on the faucet to provide an additional hose connection. The first part to screw on to the faucet or splitter is a hose end timer (battery-operated or solar) but these are optional and not required. Hose end timers are a convenient way to control the system and water automatically, useful if you travel a lot or are just too busy to turn the faucet on and off manually. They also provide an accurate way to control the total amount of time the system is open. After the hose end timer, screw on the backflow preventer, then the filter, and then the pressure regulator. All these parts should have “hose” threads, and they need to be screwed together by hand. Do not apply Teflon tape, sealant, or tighten these fittings with a wrench.
Starting a drip system from inline valve or anti-siphon valve
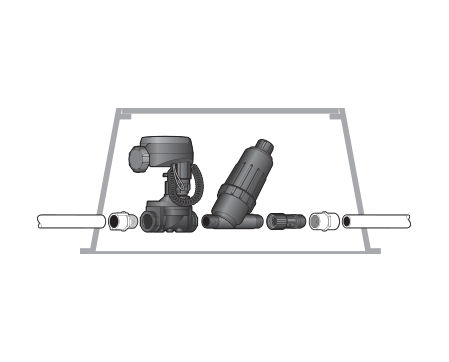
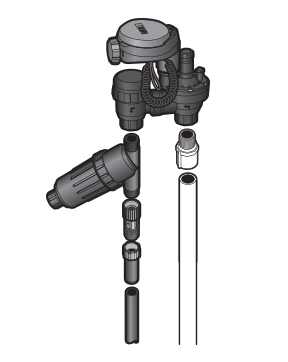
Starting a system from an AC valve, or a battery operated or solar powered controller with an inline or anti-siphon valve may require basic plumbing skills. Inexperienced installers should contact a plumber or irrigation contractor for this connection. This layout may require tapping into the water service line, typically before the faucet. If the design calls for more than one control valve, use the same type for each zone in the layout. This may involve building a manifold with a series of tees branching off to each valve. Always install a manual shut off valve before the manifold and end the manifold with a PVC cap to make future valve additions easier. Note that AC valve installations will involve running underground control wires back to an electric controller.
Starting a drip system from a 1/2″ riser
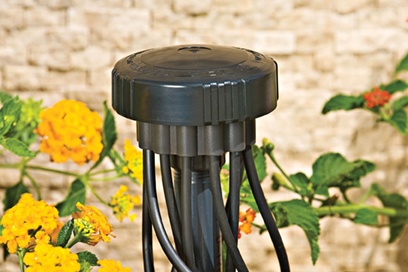
You can retrofit a sprinkler riser with a multi-outlet drip manifold or drip line system to upgrade your sprinkler system into a low flow drip irrigation system. DIG provides a full line of adapters and retrofit products that allow you to connect 1/2″ poly tubing, dripline, micro tubing, or micro sprayers to an existing 1/2″ sprinkler riser.
Starting a drip system from a tank or from a barrel for gravity flow
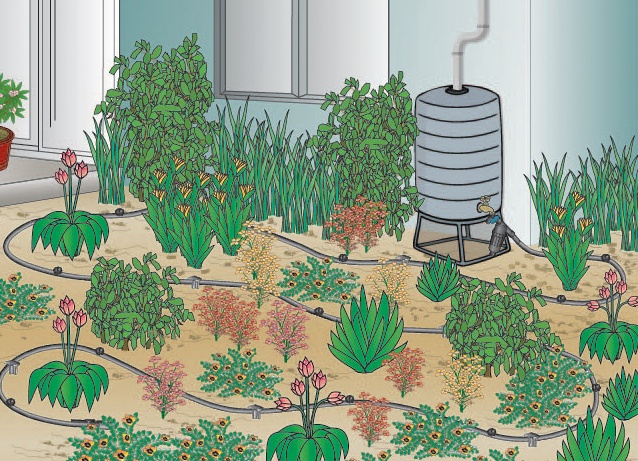
There are several ways to start and construct drip systems from a tank or rain barrel (gravity flow).Typically, the gravity flow distribution network will share the same components that are used on systems that start from a pressurized outdoor faucet. When considering gravity flow drip system designs, remember that the system pressure is dictated by elevating the tank above the emitters. The pressure wil increase by only .43 PSI per vertical foot. When considering pump verses gravity feed for your drip system, the minimum operating pressure of the emission devices, total flow rates, and water pressure will be key to efficient operation. The longer the laterals, the greater the number of drip emitters used, and the higher the flow rate of the emitters, the more pressure will be required. The only component that is not needed is the pressure regulator. It’s necessary to select non- pressure compensating drip emitters and/or 1/4″ dripline for gravity flow systems. Normally there is insufficient pressure to use micro sprinklers or sprayers.
The Distribution Network
The distribution network includes the main distribution laterals (usually made of PVC pipe in systems that start from an anti-siphon valve or inline valve), the sub distribution laterals (made of polyethylene tubing), compression or barbed fittings (such as a tee or elbow couplings), and accessories that include hole punchers, plugs, stakes to hold the poly tubing to the ground, and hose ends. In small systems the main laterals are typically poly tubing and the sub laterals are micro tubing.
Basic System Installation
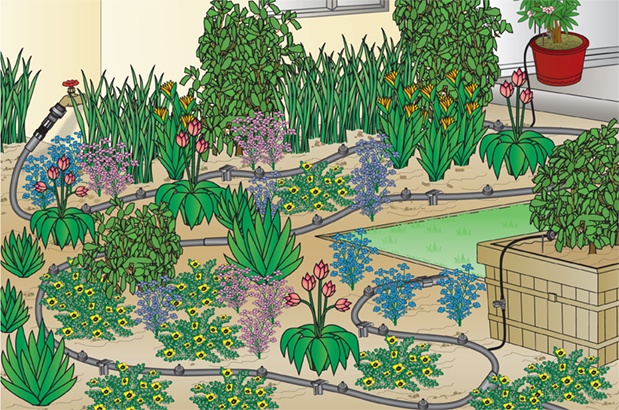
If the plant material is close to the faucet, connect the poly tubing to a swivel adapter, and screw the swivel adapter on to the preset pressure regulator. If the plant material is not near the faucet, you can connect a garden hose to the pressure regulator and run the hose out to the plants, and then connect the swivel adapter and poly tubing at the end of the garden hose. In either case, the next step is to uncoil and lay out the poly tubing next to the plants.
Drip emitters, micro sprinklers, dripline, or micro sprayers
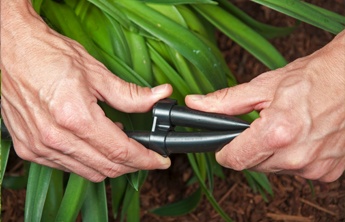
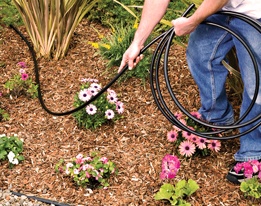
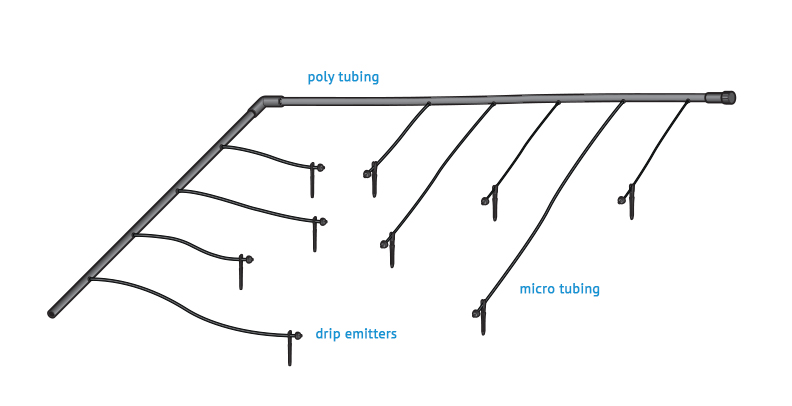
The micro sprinklers, micro sprayers, and drip emitters or dripline are connected to the poly tubing by installing a 1/2″ tee or punching a hole in the side of the supply tubing with a punch tool. Drip emitters can be installed directly into the hole or they can be extended away from the line by using a 1/4″ barb and 1/4″ micro tubing. These emission devices can be installed anywhere along the line, but the distribution uniformity of the system depends on the poly tubing diameter, length of the laterals, and operating pressure. Special care should be taken not to exceed recommended product operating pressures in order to maintain uniform distribution of water along the laterals and prevent damage to the emitters.
Final Steps
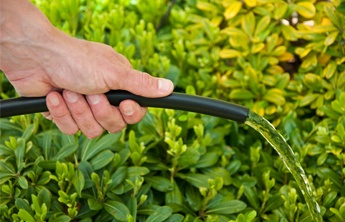
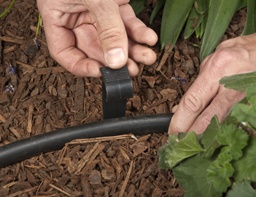
After the main lines and laterals are in place, and before closing off the ends of the lines, it’s recommended to open the water supply valve and flush out any debris or particles that may have entered the system during installation. Check the water coming out of the ends and make sure it is clear and clean before closing off the end with a flush cap or figure 8 fitting. These end points may need to be opened in the future for maintenance, so leave the ends above grade or set in a small valve box if they are buried. After all the ends are closed off, open the system valve and pressurize the system; let it run while you check the entire system for leaks, coverage, and clogs etc. Once you are certain that the system and the emission devices are all functioning properly, then it’s OK to secure the tubing to the soil with stakes every 8 to 10 feet. To conserve even more water, consider laying down a 4″ layer of mulch throughout the planted area, this will improve the soil and benefit the plants especially during the hot days to come this summer. ∼
