Sprinkler Riser to Drip Conversion Kit
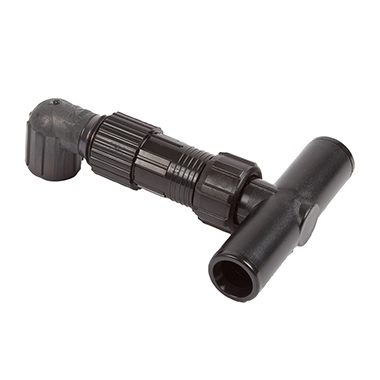
DIG’s 1/2” FPT X .700 compression tee Sprinkler Riser to Drip Conversion Kit (model DSR) is used to convert a 1/2” sprinkler riser into a low-flow drip irrigation zone. The DSR includes a 1/2” conversion adapter, a 25-PSI preset pressure regulator and a .700 OD swivel tee with a washer/filter to start a drip irrigation system for landscape plantings or lawn replacement from any 1/2” sprinkler riser. Constructed of ultraviolet-resistant, high-impact molded plastic, the conversion kit allows a 1/2” sprinkler riser to serve as the point of connection from the 1/2” riser to 1/2” dripline or drip tubing. The 25-PSI pressure regulator reduces the outgoing pressure, providing protection to the zone.
Features
- Converts a 1/2” male pipe thread riser to a two-way .700 OD compression connection
- Includes a 1/2” adapter, 25-PSI pressure regulator and swivel tee with washer/filter
- Use as a starting point to connect drip line or drip tubing into 1/2” riser
- Allows the start of a drip irrigation zone from any sprinkler riser
- Reduces incoming water pressure to the ideal working pressure for a drip system
- Simple and easy solution for starting a drip irrigation system
- Provides flexibility in converting a 1/2” riser into a drip irrigation zone in a few steps
- Secure and easy installation of drip line or drip tubing without glue or clamps
- The tee’s black insert fits all drip line or polyethylene drip tubing with .670 OD, .700 OD and .704 OD
- High-strength plastic construction with UV protection for durability and long life
How to Order
| MODEL | DESCRIPTION |
|---|---|
| DSR | Sprinkler Riser to Drip Conversion Kit, 20PSI, 1/2" FNPT |
Specifications
- Kit Includes: 1, 1/2” adapter, 1, 25-PSI pressure regulator and 1 swivel tee with a 60 mesh screen, .700 OD
- Maximum operating pressure: up to 100 PSI
- Flow rate: up to 5 GPM
- Outlet preset pressure: 25 PSI
- Inlet: 1/2” FNPT
- Outlet .700 OD compression tee fits drip line & poly tubing with .690 OD, .700 OD and .704 OD
- Screen: 60 mesh
- Temperature range: up to 130°F
- Materials: high-impact plastic with UV protection
Videos
-
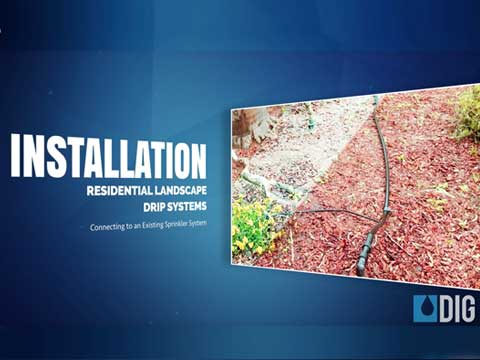
DIG drip irrigation system installation - connecting a drip system to a sprinkler riser
About:
The 1/2” female pipe thread x .700 compression tee Sprinkler Riser to Drip Conversion Kit (model DSR) provides a simple and economical way to convert a 1/2” sprinkler riser into a drip irrigation system zone.
Installation Suggestions:
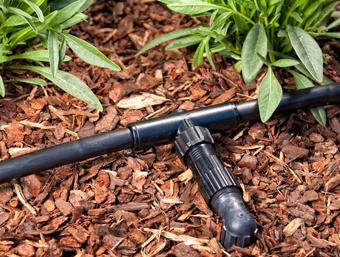
Start the drip irrigation line zone from an existing 1/2” sprinkler riser:
- First, unscrew the sprinkler head from the riser.
- Attach the 1/2” female pipe thread x .700 compression tee Sprinkler Riser to Drip Conversion Kit by screwing the 1/2” conversion elbow clockwise onto the riser male thread.
- Connect the drip line or drip tubing
Option 1:- Connect the drip line or drip tubing to one side of the tee.
- Secure the drip line/drip tubing to the ground using the holder stake and keep the end of the line open.
- Open the valve and flush out the line, then connect the end of the line to the other side of the tee for a complete loop system.
- If drip tubing is used, install drippers and/or micro sprinklers.
Option 2:
- Connect the drip line or drip tubing into each side of the tee.
- Secure the drip line/drip tubing to the ground using the holder stake and keep the end of the line open.
- Open the valve and flush out the drip line, then close off the end with a figure eight or compression end cap.
- If drip tubing is used, install drippers and/or micro sprinklers.
- Open the system valve again and test the zone to make sure there are no leaks.
- Program the zone to operate twice per week or in compliance with the restrictions set for your area (if any).How much time to water: Open the system valve for 20 to 90 minutes every three to five days, depending on your location, plant species and the soil type. After a week or two check the soil and the health of the plants, and adjust the irrigation time as needed.
About the soil and suggested drip emitters spacing
- Sandy soil or light textured soil: Water percolates straight through before it can spread far enough horizontally, so use drip line or drip emitters in close spacing of 12” apart. Apply water at frequent intervals such as every three days for 20 to 90 minutes depending on plant size and type, daylight conditions (full sun, partial sun or shaded) and weather conditions (cold to hot) with the plants under full sun in hot conditions getting the longer period.
- Loamy soil or medium textured soil: This is the ideal soil condition with water moving slowly and spreading evenly, so use drip line or drip emitters with 18” spacing. Apply water at wider intervals such as every three to four days for 30 to 90 minutes depending on plant size and type, daylight conditions (full sun, partial sun or shaded) and weather conditions (cold to hot) with the plants under full sun in hot conditions getting the longer period.
- Clay soil or heavy textured soil: Water is absorbed very slowly, so use drip line or drip emitters at a spacing of 18” to 24” apart. Apply water at longer intervals such as every four to five days for 30 minutes to 90 minutes depending on drip line, drip emitter flow rate, plant size and type, daylight conditions (full sun, partial sun or shaded) and weather conditions (cold to hot) with the plants under full sun in hot conditions getting the longer period.