RBC-MVA Single Station Battery Operated Timer with 3/4″ Actuator
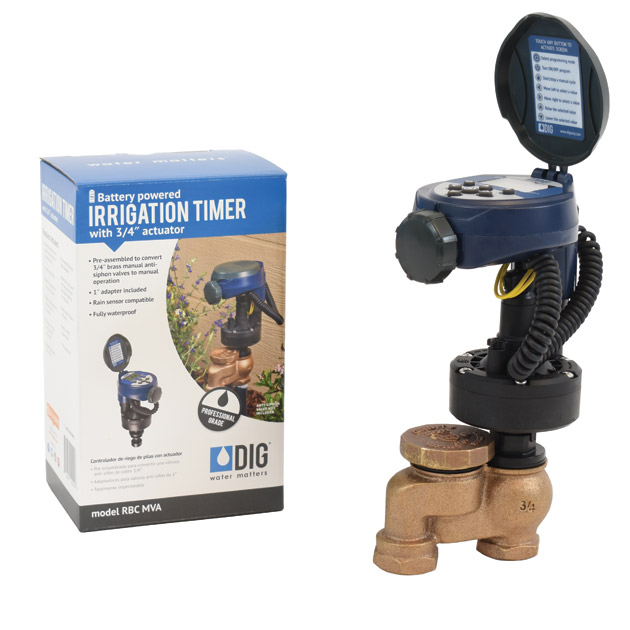
The RBCMVA Single-Station Battery Operated Timer mounted on a 3/4″ actuator has joined DIG’s innovative and rugged line of battery operated timers, for use in residential and commercial applications or where AC power is unavailable. Outfitted with the latest and most efficient electronic management technology, the RBC MVA can operate up to three years on two AA alkaline batteries. It features a large, easy-to-read LCD screen and simple icon-based programming with weekly or cyclical programs. The timer’s professional grade actuator is used to convert 3/4″ and 1″ brass or plastic manual anti-siphon valves to automatic operation and includes flow control with an external manual bleed for smooth opening and closing. Completely waterproof and able to operate in harsh environments, the RBC MVA is the simple and dependable solution for any irrigation systems that start with a manual anti-siphon valve.
Convert 3/4″ and 1″
- Champion (brass)
- Orbit (brass and/or plastic)
- Buckner/Superior (brass)
- Lawn Life, Fairway (brass)
Features
- Powered by two AA alkaline batteries with a safe period of 60 seconds to replace without losing the program
- Watering flexibility with a selection of watering frequencies and four start times
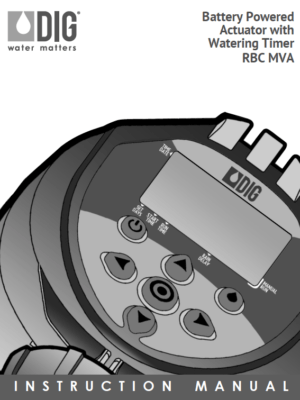
- Seven buttons with integrated high resolution screen
- Easy-to-read LCD display with AM/PM clock and icon-based programming for easy navigation
- Blinking notification on days the timer is active
- Programming time options in AM/PM or 24 hour
- Non-volatile memory retains program and timer integrity (excluding time)
- Emergency backup program of five minutes every 24 hours if no program is selected after battery installation, starting at 8:00 AM
- Manual irrigation cycle can be performed via the timer manual program button or via the solenoid
- One button for program off until reactivated or as an irrigation suspension override (rain mode)
- Energy conservation; after 15 minutes the timer screen is turned off automatically
- Low battery indicator
- Semi-automatic, automatic or manual operation
- Retractable coiled cord for easy removal of the controller
- Factory assembled to fit 3/4″ Champion and Orbit manual brass valves with adapter for 1” included in the package.
- The actuator is available with manual flow control and external manual bleed supported by stainless steel screw
- Threaded battery cover with O-ring for waterproof protection of the batteries
- Latching solenoid with encapsulated plunger and spring for reliable operation
- Wire ready for a rain sensor
- The timer interior is completely waterproof (IP68) – can operate in harsh environments
- Environmentally friendly; utilizes RoHS compliant components
- Battery life up to three years
- Three year warranty

How to Order
| MODEL | DESCRIPTION |
|---|---|
| RBC MVA | Single Station battery operated timer with 3/4 in actuator and flow |
Specifications
- Operating pressure: 20 to 125 PSI
- Temperature range: 38-130°F (3-54°C)
- Assembled with 3/4” adapter and washer, including in the package 1” adapter with washer
- timer power source: two AA alkaline batteries (not included)
- Solenoid with enclosed plunger: Two-way magnetic latching, normally closed, 7-12 Volt DC with two wires
- Retractable solenoid wire: 4.1” (coiled length when extended, approximately 18")
- Materials:
- Timer housing: high-impact plastic
- Actuator and solenoid: glass reinforced nylon
Programming options
- Watering duration: 1 minute up to 5 hours and 59 minutes set in 1 minute increments
- Watering frequency: weekly or cyclical schedule with odd days, even days, or intervals from one to thirty (1- 30) days
- In weekly schedule, the timer can be programmed to operate on any day of the week such as Monday, Wednesday, and Friday.
- In cyclical schedule, the timer can be programmed to operate on odd days, even days, or on any day such as every three days.
- Up to four start times per day in weekly or cyclical schedules provides added flexibility for any type of watering application, including sandy or clay soil.
- Rain off/delay option with automatic restart up to 99 days
- Program off option holds program until reactivated
- Manual cycle via the program with automatic shutoff option
Manuals
 English
  Spanish
 Videos
-

DIG RBC Series Battery Operated Timers: Programming
-
DIG Drip Irrigation System Installation: Manual Valve Actuator
About
The RBC MVA battery operated timer is factory assembled to fit 3/4″ Champion and Orbit manual brass valves. Included in the package, you will find a 1″ adapter and seat washer used to fit 1” Champion, Buckner, Superior, Lawn Like, Fairway, Orbit manual brass valves, 3?4″ and 1″ Orbit plastic valves. The RBC MVA can covert most manual brass or plastic anti-siphon valves to automatic operation.
NOTE: Please select proper adaptor.
Seven buttons with the center four buttons (left, right, up, and down arrows) are used to select or modify a program parameter. A large button accepts the parameter change and moves or skips to the next step or icon. The upper right button manually powers the timer on or off while the upper left button is used to stop irrigation.
Recommendations: Wrap all fittings with Teflon tape. Do not use pipe cement on the valve as it will damage the valve thread and void the warranty.
Battery installation
This timer requires two AA batteries (alkaline battery recommended)
- To install the batteries, unthread the gray battery compartment cover on the front side of the timer and insert two AA batteries. The polarity is marked for direction on the back of the timer.
- Thread battery cover clockwise to close.
- If the timer has been programmed, you have a safe period of 60 seconds to replace the batteries before losing the current time/date.
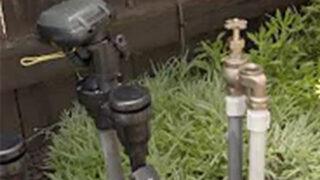
Installation
- Shut off the water supply.
- Remove the manual stem from the existing valve. If you are converting an anti-siphon valve, temporarily remove the anti-siphon cap (you will need to install the actuator and the cap together).
- Replace any existing worn washers with the new ones provided.
- Install the timer with the actuator into the manual valve; using a wrench, tighten firmly, but do not over tighten.
- Rotate the flow control clockwise until completely closed.
- Turn on the main water supply.
- Test the timer using the manual on/off button located on the upper right side. Press the button once. A click will be heard indicating the valve is open (a manual operation icon and icon indicating the valve is open will appear on the upper and lower right side of the screen).
- Now, rotate the flow control counter clockwise, one turn at the time until the valve is operational and all sprinklers/sprayers are working evenly and to your satisfaction.
- Press the manual on/off button again to turn the timer off. A click will be heard indicating the valve is now close (The manual icon will disappear and the valve will close.
- Program the timer.
NOTE: If water continues to flow, turn the flow control slowly clockwise a 1?4 turn at the time. Repeat steps 5-9 if necessary.
Review the instruction manual included with the unit for details
Adding a rain sensor or any other closed contact sensor - If a rain sensor or other closed contact sensor is used, cut the yellow wires and add the sensor per the sensor instructions, making sure to use a waterproof wire connection.