FM01AS Patio Drip Watering Kit
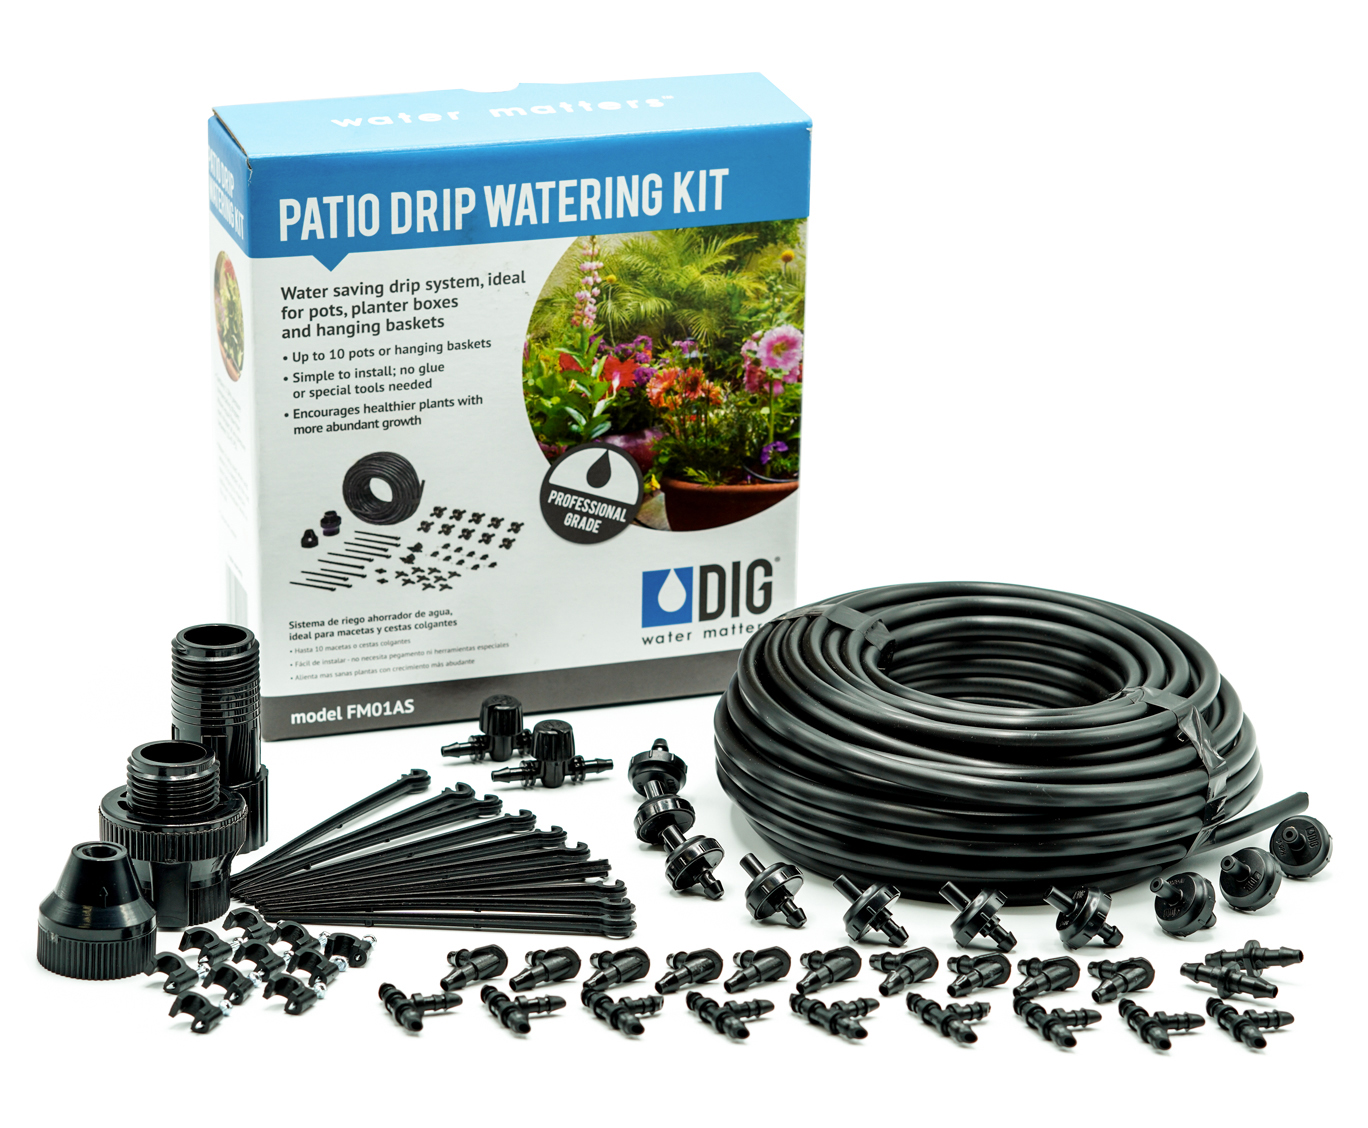
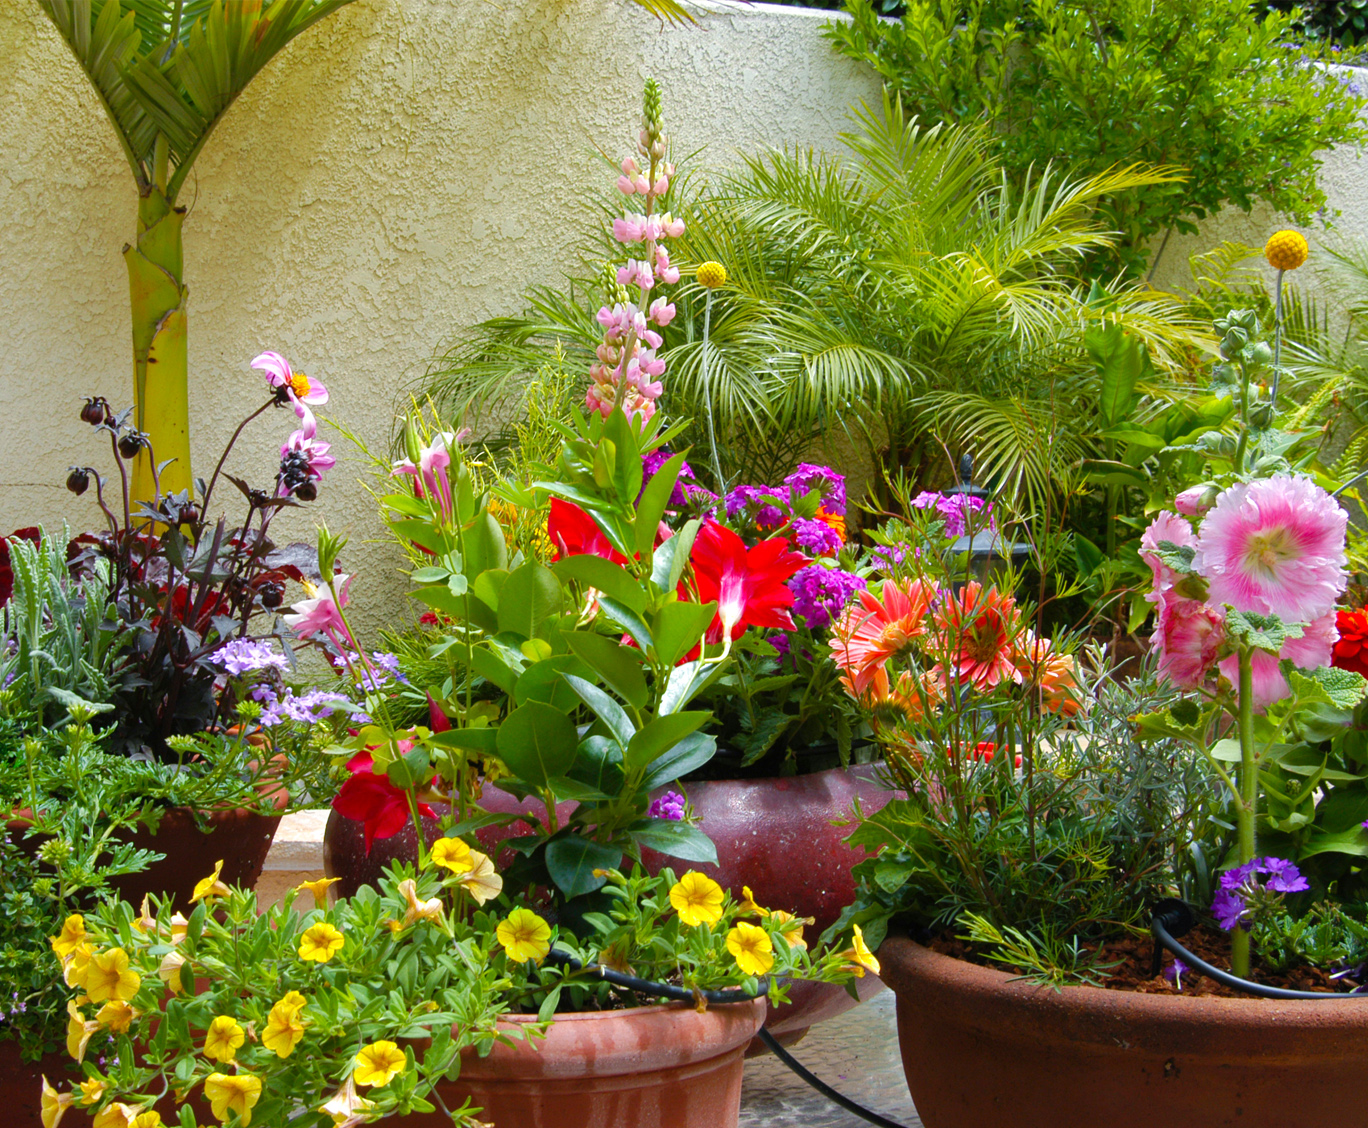

DIG FM01AS Patio Drip Watering Kit is a complete kit with pressure compensating (PC) drip emitters to water up to ten hanging baskets, pots or containers decorating a patio or pool area. The Patio Drip Irrigation Watering Kit contains all the parts to start a system from a faucet or a garden hose and can be expanded to cover up to fifteen small-to-medium-sized hanging baskets or pots using additional micro tubing and PC drip emitters with the same flow rate. The kit includes a 3/4″ backflow preventer, ¾” 25 PSI preset pressure regulator, 3/4″ FHT x 1/4″ compression adapter, 60′ of 1/4″ micro tubing, ten PC drip emitters, 1/4″ tees and all necessary parts to complete the installation.
Features
- Use to water hanging baskets, pots or containers in or around a patio or a pool area
- Contains 10 1-GPH PC button drip emitters for up to 10 pots or baskets
- Applies water at a low application rate leading to less surface evaporation from leaves and soil
- Offers flexibility in watering frequency and application rate, minimizing surface compacting and runoff
- No special tools or glue are needed
- Saves money by significantly lowering the cost of system
- DIG’s drip irrigation products may be exempt from residential and commercial watering restrictions (check local codes)
- Ease of watering with lower water use and less water waste
How to Order
| MODEL | DESCRIPTION |
|---|---|
| FM01AS | Patio Drip Kit |
Specifications
- Maximum incoming operating pressure: 50 PSI
- Recommended operating pressure: 25 PSI
- Maximum recommended flow rate @ 25 PSI: 15 GPH (.25 GPM)
- Drip micro tubing length & size: 60' x 1/4"
- PC drip emitter flow rates: 1 gallon per hour (GPH)
- Total flow rate for this kit: 10 GPH (.166 GPM)
Box Contents
| qty | description |
|---|---|
| 1 | 25 PSI FHT X MHT pre-set pressure regulator |
| 1 | 3/4" backflow preventer |
| 1 | 3/4" adapter with screen filter |
| 10 | 1 GPH PC drippers |
| 9 | 1/4" tees |
| 2 | 1/4" barb connectors |
| 10 | 1/4" mounting clips |
| 10 | tubing holder stakes |
| 1 | 60' of 1/4" micro tubing |
| 2 | 1/4" ball valves |
| 1 | Instruction manual |
Manuals
 English
 About
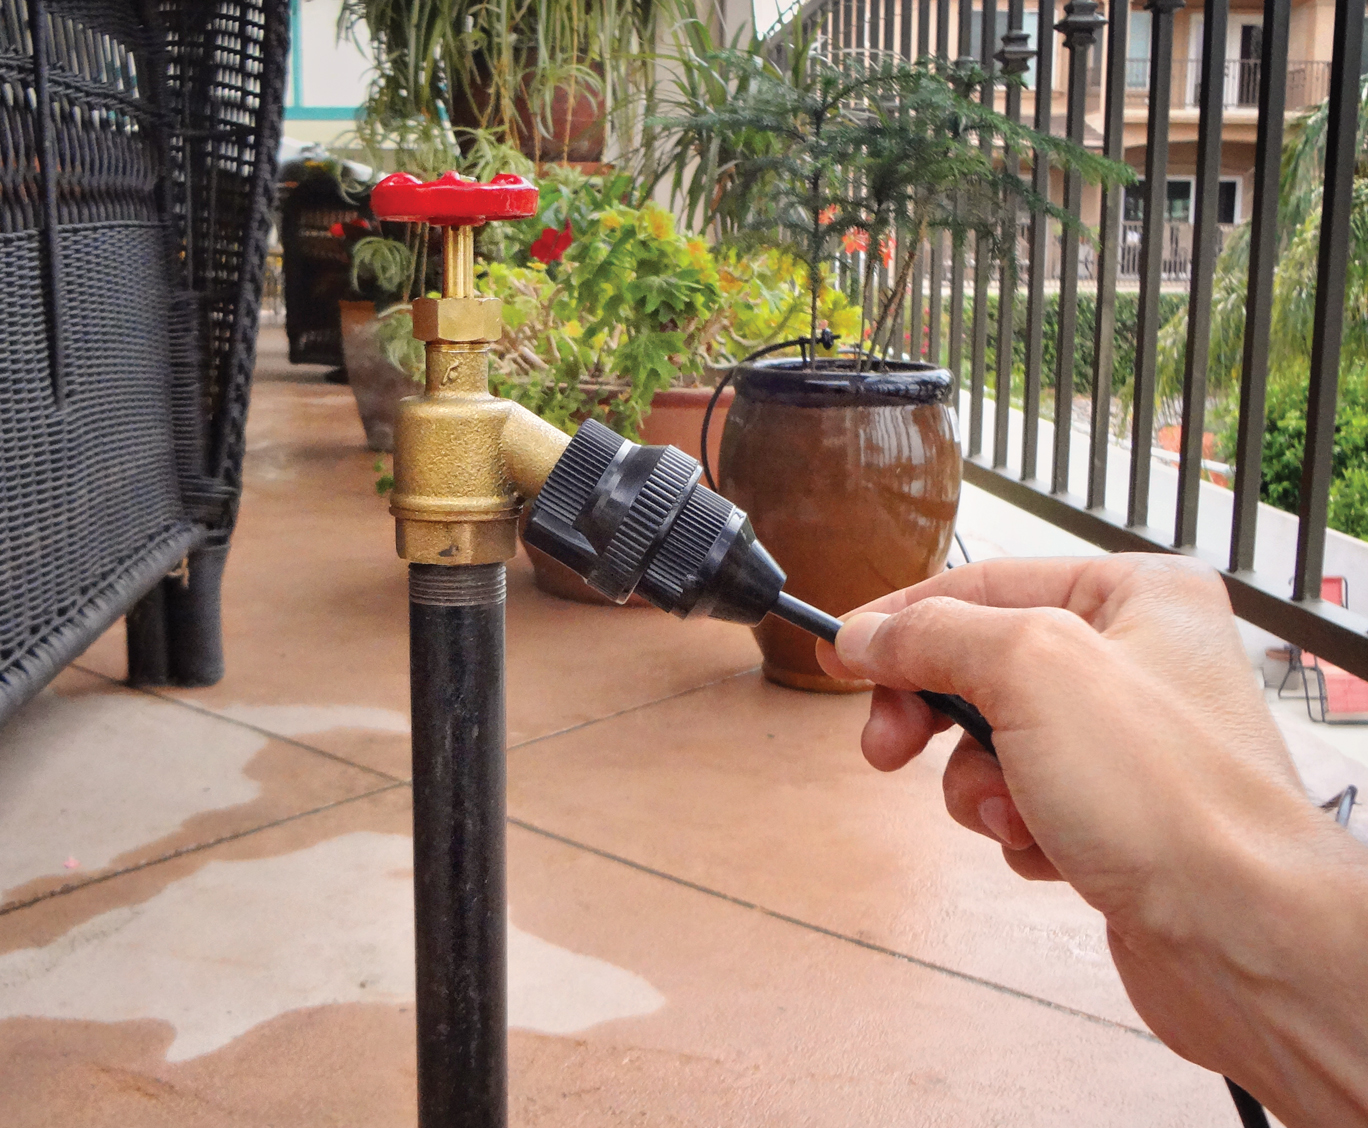
The FM01AS Patio Drip Watering Kit can be used in patio or pool areas to water pots and baskets. It uses pressure compensating drip emitters for even uniformity along the length of the micro tubing. This is a starter kit that can be started from a 3/4″ hose garden or faucet/spigot. We highly recommend installing a 25 PSI pressure regulator (not included) after the backflow preventer. The pressure regulator is used to lower the incoming pressure of the system to the suggested operating pressure of 25 PSI, which is within the range of recommended pressures for a drip irrigation or micro sprinkler system. The instruction manual for this kit can found in the package.
Using drip irrigation, water first thing in the morning before the temperatures begins to rise. This will allow excess moisture on leaves and top soil to dry before fungal and other diseases can develop. The most common cause of early plant death is over watering. Using drip irrigation can help sustain healthy plants by applying water directly to the plant root zone when and where it is needed. For established pot plantings, short watering times are recommended.
We provide the following installation steps as general suggestions. They are other ways to install this kit.
Installation Steps
 Connect to your water source using a backflow preventer, filter (recommended) and pressure regulator.
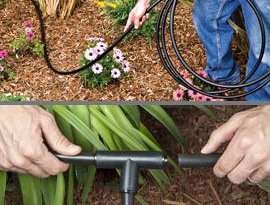 Lay the micro tubing around plants and connect with barb connectors.
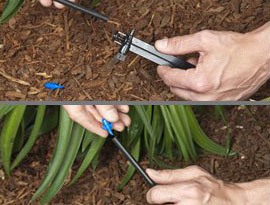 Install drippers into the end of the micro tubing.
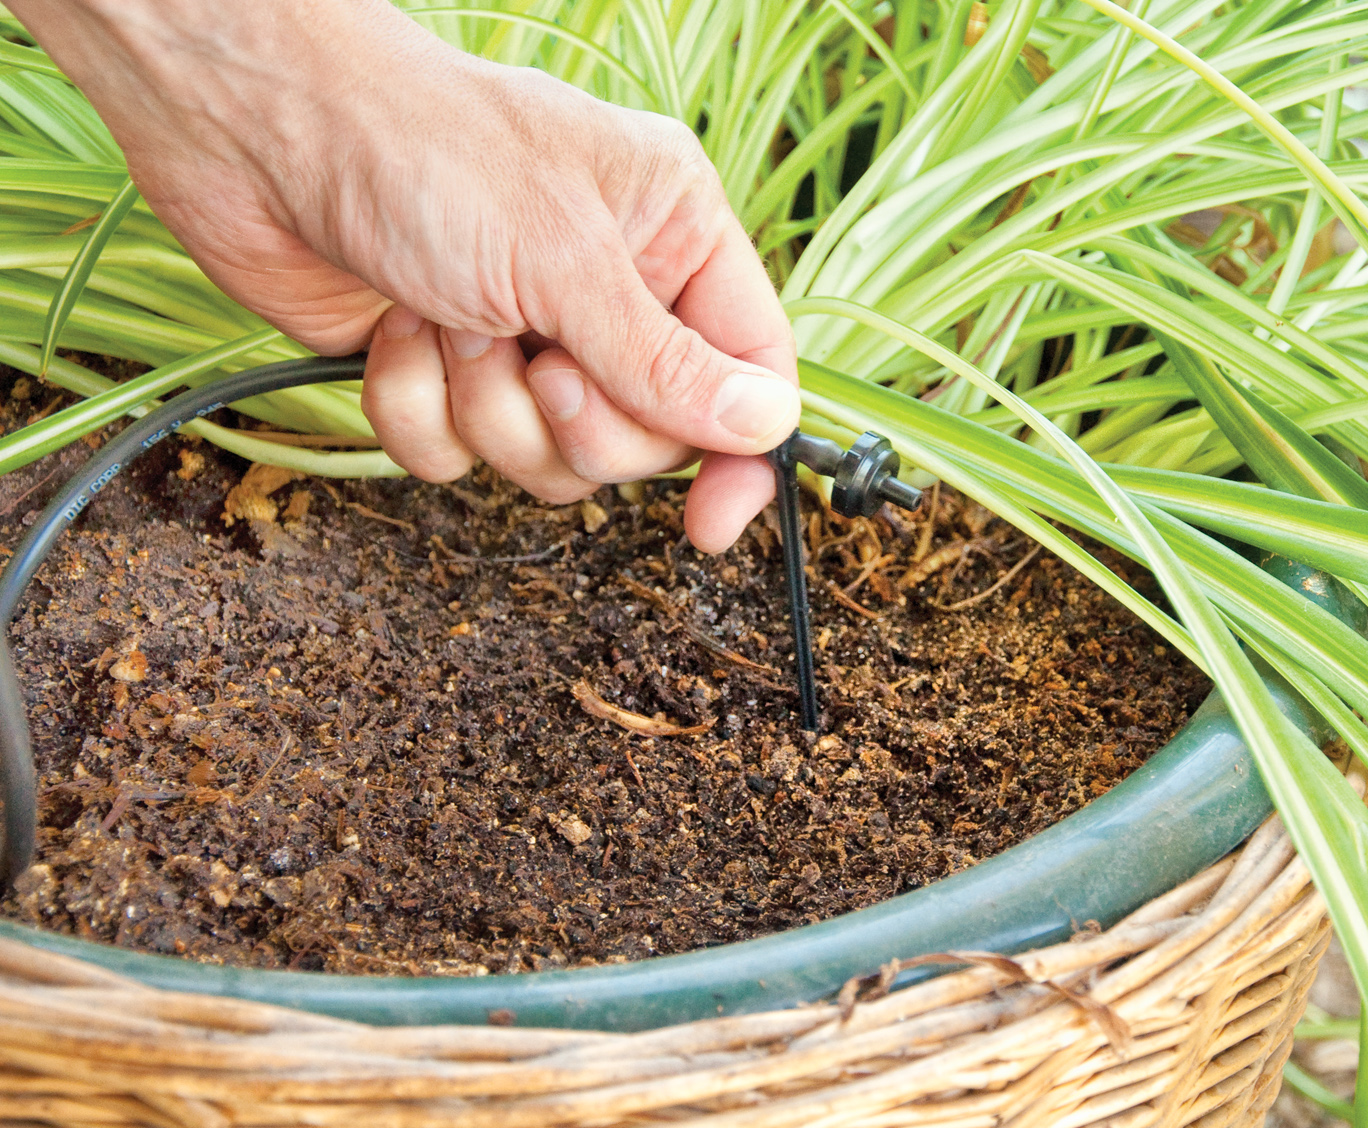
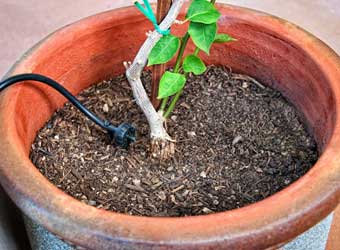
 Secure micro tubing and dripper with a tubing holder stake near the base of a plant.
Example layout:
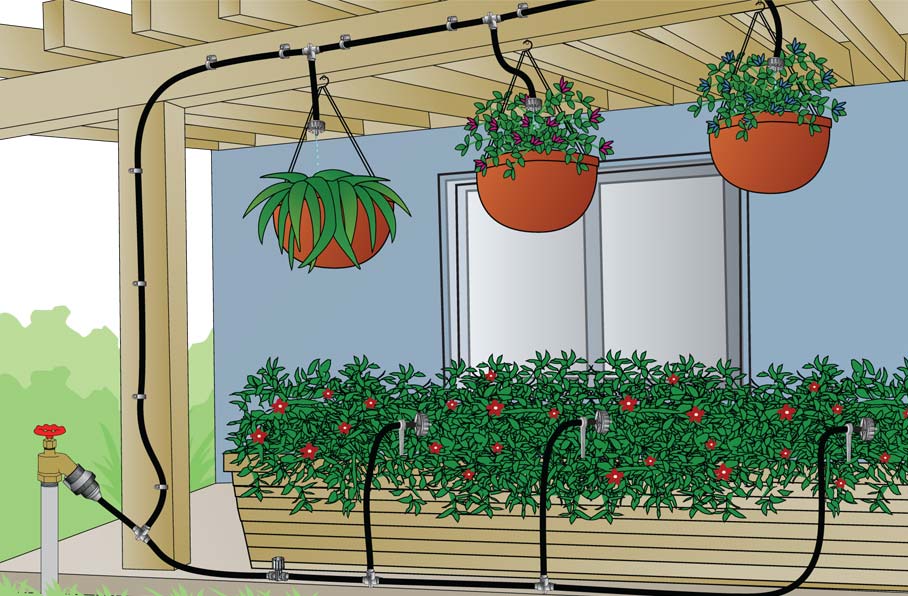
Start the kit from a faucet or garden hose
The basic installation recommendation for this type of kit is first to review the area or section you wish to irrigate and then to make a drawing of the garden or site with your preferred layout. Keep a record of this information for future expansion or schedule maintenance
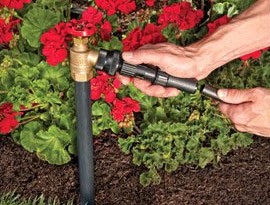
- In the installation stage, to the faucet, first connect the backflow device (model D45), then a pressure regulator (model D46 not included) and then a 3/4″ adapter with screen (model C37B). If water quality is a concern, we highly recommend using a fine mesh 3/4″ filter with 155 mesh (model D57A), not included with this kit.
- Divide the pots and baskets into groups, such as small and large pots or baskets or pots in shaded or sunny areas.
- Connect the 1/4″ micro tubing into the adapter by forcing the micro tubing and wiggling it in, and lay out the micro tubing to the pot and basket area.
- If used with hanging baskets secure the micro tubing to the structure using the 1/4″ mounting clips with nails included (model D474B).
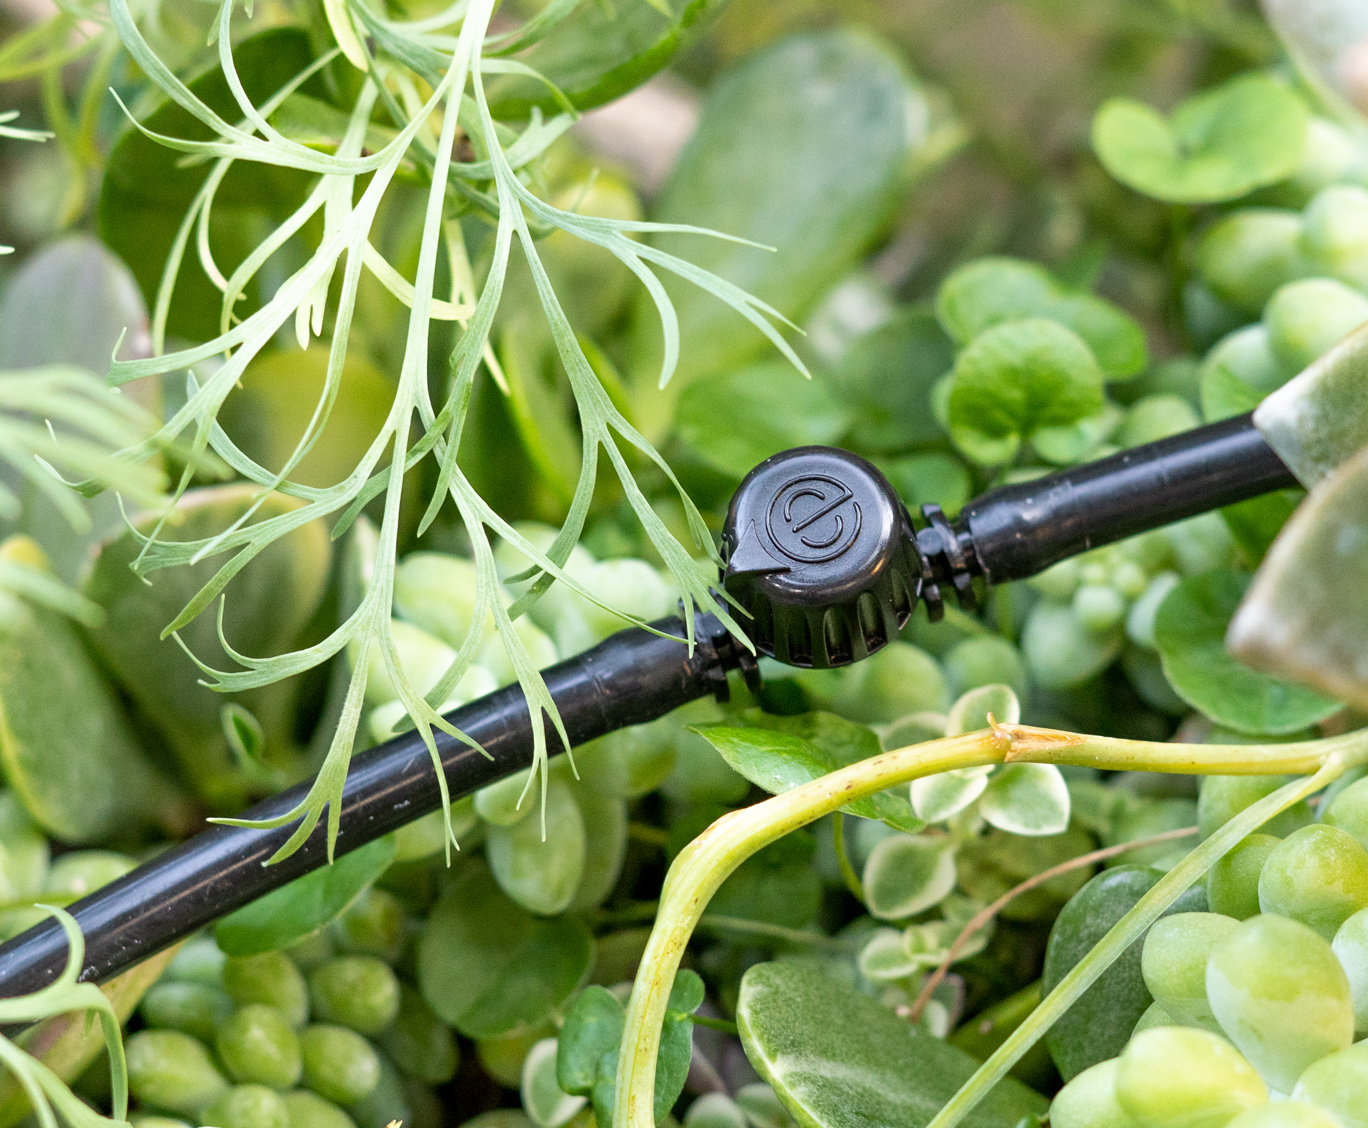
- If dividing the pots or baskets into groups, at the beginning of a group cut the micro tubing and add a 1/4″ ball valve (model # D33A). The ball valve can be used to adjust the flow to the group.
- To the 1/4″ ball valve, connect the micro tubing and lay it out along the pots, baskets or containers in the group.
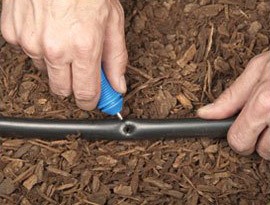
- Near each pot or basket, cut the 1/4″ micro tubing and insert a 1/4″ barbed tee (model H82A or H82B). To the tee, add a length of micro tubing and extend the micro tubing to the plants area. Repeat the step for each pot and basket.
- Turn the water on to flush line for 15 to 20 seconds and after the line is flushed turn the water off.
- To each end of micro tubing, insert a drip emitter and secure the drip emitter into the pot or basket with the 1/4″ stake included (model P33B).
- a. For baskets of up to 8″ in diameter, use one 1-GPH drip emitter per pot (model B221B).
- b. For large pots or baskets more than 8″ and up to 12″ in diameter: Inside the pot or basket, instead of the drip emitter, add a 1/4″ tee. To each side of the tee, add a 4″ to 6″ length of micro tubing. To the end of the micro tubing, add a 1-GPH drip emitter and secure the drip emitter using a 1/4″ stake.
Note: To expand the kit we highly recommend continuing with the same model drip emitters.
- How much time to water: Turn the water on for two – five minutes. The goal is for all the pots and baskets regardless of size to drain at the same time. If using a hose end timer, program the timer for about one – three minutes less than the time it took the pots and baskets to start draining. If the plants need more water, program additional start times. Run the irrigation system for two to three days a week, depending on your location and the soil type. After a week or two, check the pots and the health of the plants, and adjust the watering time as needed. Use the valve for your final adjustment.