Drip Irrigation Products & Installation Procedures Container Gardening
by Stuart Spaulding —
CLIA Certified Landscape Irrigation Auditor Training & Communications Manager at DIG Corp.
Drip Irrigation Products & Installation Procedures for Container Plants, Herbs and Flowers
People have been successfully growing plants in flowerpots and containers for hundreds of years, and for several good reasons:
- Plants in containers can add beauty, fragrance and color to sometimes barren patios & decks
- Growing plants, herbs and flowers in containers is often the only option for gardeners in urban, high density dwellings with little or no yard
- Container gardening is a good option to utilize in sites where the existing soil is of poor quality, unworkable, or lacking nutrients.
Potting Soils and Drainage
Most plants in containers are growing in fast draining, light and loamy potting soil. This type of soil tends to absorb water quickly, but not hold it for a long time, so it is necessary to apply the water very slowly and frequently, (even in larger containers) to avoid excessive drainage and overwatering.
Install a Separate Drip System for Containers Only
This is one reason why it is important to install the container plants on a separate drip system from other shrubs and trees that are planted in the ground. The main reason has to do with irrigation scheduling. Container plants will need to be watered for shorter runtimes and more frequently than plants that are growing in the ground. So, if landscape plants and container plants are irrigated on the same drip zone, then one or the other will likely be under or over watered, no matter what drip/emission products are installed. For example, a typical schedule for a container system might be to run it for 3-4 minutes every day or every other day. This would not be an appropriate schedule for a landscape drip system for in ground shrubs and trees and would result in under watering and promote shallow root growth and unhealthy in-ground plants and trees.
Container Size Matters
Small containers, (less than 12” across) are best irrigated with a single, ½ gallon or 1/3 per hour dripper. The dripper should be connected to the end of ¼” micro-tubing, and held in place with a stake so the dripper is a few inches away from the plant’s stem. Low flow drippers are also available on a stake which simplifies installation. Pots smaller than 10” across will drain very fast and are more problematic to irrigate. If there are containers that are smaller than this, it is best if the plants are transplanted into a larger pot. For plants in larger containers, there are more options available.
Larger Containers
There are more emission device options to consider for irrigating plants in larger containers:
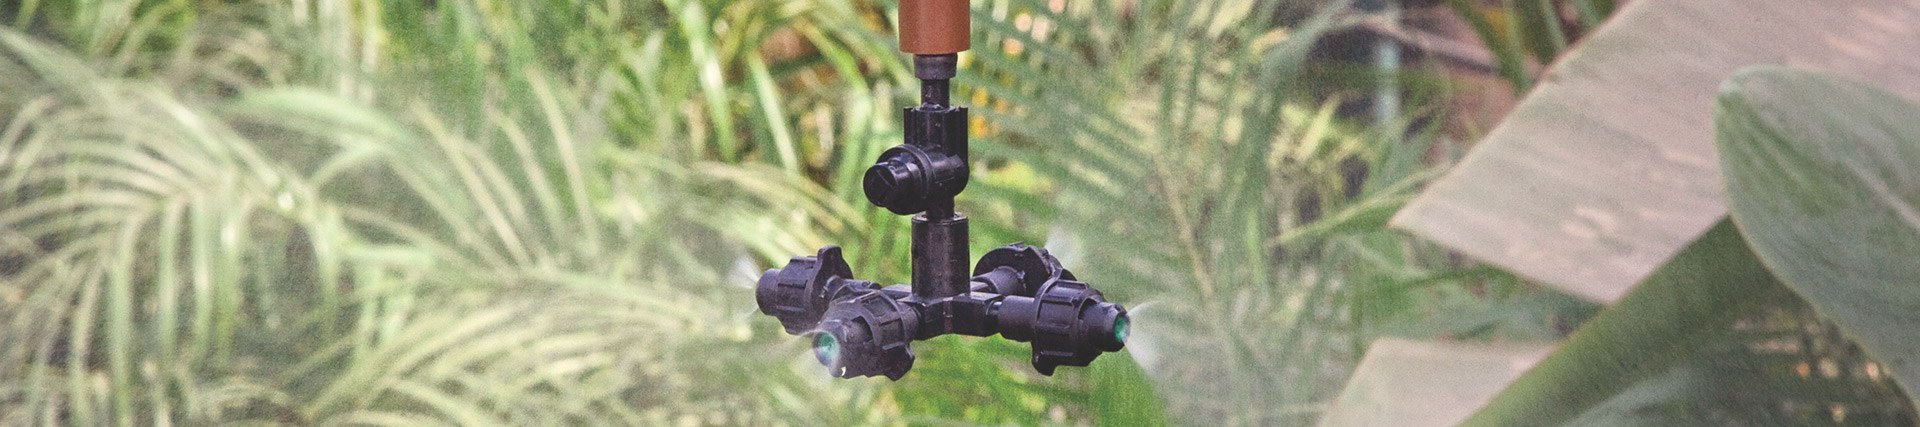
- Misters and Spitters. These are small micro-sprayers that usually include a stake of some kind and are specifically designed for plants in larger containers. Like all emission devices for containers, they have a very low flow rate, and connect to the end of ¼” micro-tubing (spaghetti tubing). This type of emission device is preferred for plants that benefit from overhead spray. When more than one is required, a ¼” tee is installed where the micro-tube reaches the container to branch off to the second sprayer.
- ¼” Dripline: ¼” dripline is a type of soaker hose. It is basically ¼” polyethylene micro-tubing that has low-flow drippers factory installed every 6, 9 or 12 inches. The 6 or 9 inch spacings versions are a good choice to irrigate larger containers. The product is connected to the end of ¼” micro-tubing by using a ¼” barb or tee, and it is usually coiled around the plant(s) and ended with a ¼” plug. A ¼” shut off valve can be installed to fine tune the flow.
- Porous Soaker Hose: This is another type of ¼” soaker tubing that works well for container plants of all types. It is connected to the supply line in the same way as ¼” dripline, by using ¼ barb fittings. This type of tubing is made from recycled rubber and polyethylene. The water “weeps “continuously out of the entire line, and it has good uniformity if the runs are less than 5 feet. ¼” stakes can be installed to keep the dripline or soaker hose in place.
Final Steps
When the system installation is complete, open the control valve and pressurize the system. Then inspect each container for leaks and adequate coverage. Also keep track of how long it takes until water starts to drain out of the bottom of the containers. It may be necessary to make some final adjustments to the ¼ ball valves or dripline to get the pots to all start draining after the same amount of time. Then subtract a minute or two from this duration and use this run time for your initial duration. To keep the root zone and soil at the optimum moisture level, most container drip systems will need to be to be operated frequently. So, consider installing a simple battery or solar powered hose end timer to automate the system to save time, increase yields and promote healthy plants and flowers.